If you are an omnivore, bacon is at or near the top of your food pyramid. For those not familiar with the food pyramid, it is an outdated graphic from my youth showing what we should be eating and how much.
Bacon or some form of it goes back thousands of years to the Chinese who cured fatty pork belly with salt to preserve the meat. I’m talking 1500 BCE. It is unknown exactly when smoke entered the picture, but smoking meat has been a method of meat preservation for millennia. It is speculated that the ancient Romans picked up the practice from Middle Eastern conquests.
Christopher Columbus brought 8 pigs to Cuba reportedly at the insistence of Queen Isabella and Hernando de Soto introduced 13 pigs to Tampa Bay in 1539. Within 3 years his herd had grown to 700 head and were subject to raids by Native Americans who became fond of the unusual meat. The pigs that managed to escape to the wild became the ancestors of America’s feral stock. Pigs breed fast and will eat almost anything.
Bacon is produced from different parts of the pig in various parts of the world, but in the U.S. belly or side bacon is the favorite. With it’s high fat to lean ratio, it was a lessor cut and cheaper than more meaty parts meaning food for poor folks. This is not true today. U.S. bacon sales in 2013 reached almost $4 billion. In response to a survey conducted by Smithfield in 2014, 65% of Americans said they supported bacon as their “national food”.
In a health conscious society, the rise of bacon seems like a backward step but Americans have always had a contrary streak. In a Salon.com article in 2008, Sarah Hepola considers it an act of rebellion : “Loving bacon is like shoving a middle finger in the face of all that is healthy and holy while an unfiltered cigarette smolders between your lips.”
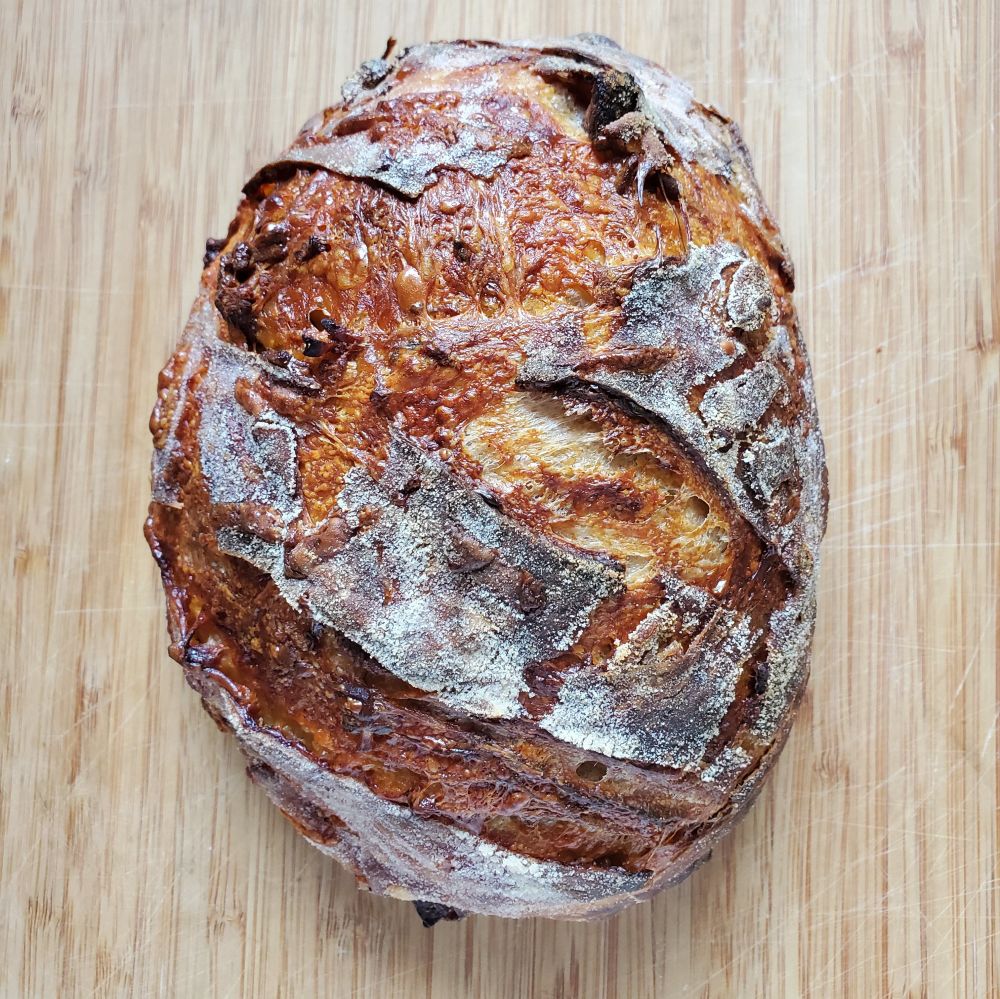
I bake sourdough and love bacon. It should have come as no surprise that when I posted photos of a Bacon Cheese Sourdough Batard people responded. The recipe has been repeatedly requested and this post is in response.
I rarely use bacon as an item of it’s own like a side of crispy bacon with some eggs. It is used as a seasoning meat for beans, etc. A 3 lb mass of twisted misshaped smoked bacon ends is my usual purchase. It is cut into blocks of perhaps 1/3 lb and stored in sandwich sized ziplocks in my freezer ready for whatever dish I choose to make. It thaws quickly and is always available.
Like all sourdough, everything starts the day before. I have been making dough in the morning recently so before I go to bed, I set up the levain. In a small 250ml jar I add 15g starter plus 30g water and stir. To this I measure 30g of my starter mix which is 1/3 Whole Wheat and 2/3 AP. A good stir again and the levain goes on top of my fridge until morning. My standard feeding ratio is 1/2/2 or 1 part starter, 2 parts flour, and 2 parts water. It is a 100% hydration starter. Your levain should be mature or near the top of it’s rise before inoculation. In mid February, Los Angeles, this takes between 9 and 12 hours for my starter. Yours will be different depending on kitchen temperature. A mature starter means you will get a good consistent rise.
In the morning, I know I have a window of time to start the dough of about 3 hours until the levain starts to recede. Know your starter and when it is ready to go.
My standard dough recipe is 20% White Whole Wheat, 30% Bread Flour, and 50% AP, all King Arthur. I add 2% salt and the hydration is about 70-75%. The hydration varies with different bags of flour. I start at 70% and the feel of the dough lets me know if it needs to go higher.
I have recently converted to the everything in the pool method of mixing dough. For some time I had always just mixed flour and water first and let it autolyse for about an hour but Foodgeek Sune convinced me this is not necessary.
Weigh the flour into a large bowl, weigh in salt and mix. In a separate small bowl, mix weighed starter with just a bit of water to loosen it up. I use a tiny whisk. Slowly add more water as it breaks up using in total about 75% of the water. Make a well in the flour and add starter mix. I use a Danish Dough Whisk to mix. You will likely not be able to get all of the flour hydrated and I do not even try yet. Once the starter is mixed in, I add water around the sides of the bowl to wet any flour still dry and continue to mix until a good dough ball is formed. It will be a shaggy mass but not too dry. I always use my hands to finish so I can feel the dough. Sometimes less water works and sometime I need just a bit more a teaspoon at a time. Once it feels right, I scrape down the sides of the bowl and cover for one hour.
After the autolyse, I perform a stretch and fold then cover for 40 minutes. Set timer for 40 minutes and another stretch and fold. The timer tells me when it is time for the first coil fold another wait and one more coil fold. Now nice and elastic, the dough goes into a square bulking container for bulk ferment. After 3 to 4 hours I get to shaping the dough.
At this point, a sidebar about timing for agitation and bulk ferment. When the kitchen temperature is warmer I stretch and fold at 30 minute intervals. It is currently 64° outside (Noon) and my kitchen is no more than 68° so I add some time. Bulk fermentation depends on temp as well and starts when you inoculate the dough. At current conditions, it has been taking 6 or 7 hour until the dough has risen approximately 150%. I do not look for the dough to double in size. 1.5x rise seems the sweet spot for me before a retard in the cold. I retard by volume and not time. A straight sided container makes this fairly easy to judge.
Once I am happy with the rise, I invert the bulking container on an unfloured board and let the dough come out on it’s own time. Gently it goes to keep as much gas as possible. The dough is stretched into a rectangle and then folded by thirds. For me, right over left by one third and then left over right. I now have a skinny rectangle that I roll away from me to get a log. I pull the short ends of the log to the bottom to encase the ends and cover for 20 minutes. I do not currently have images or video but I suggest Foodgeek for the visual.
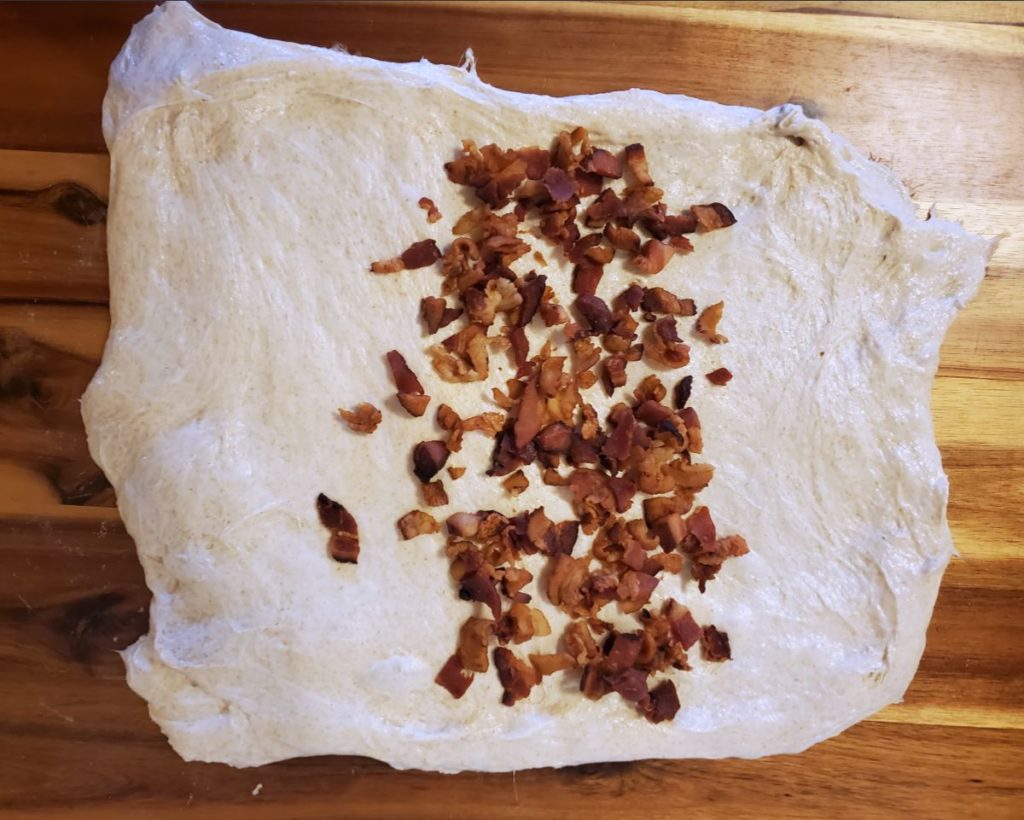
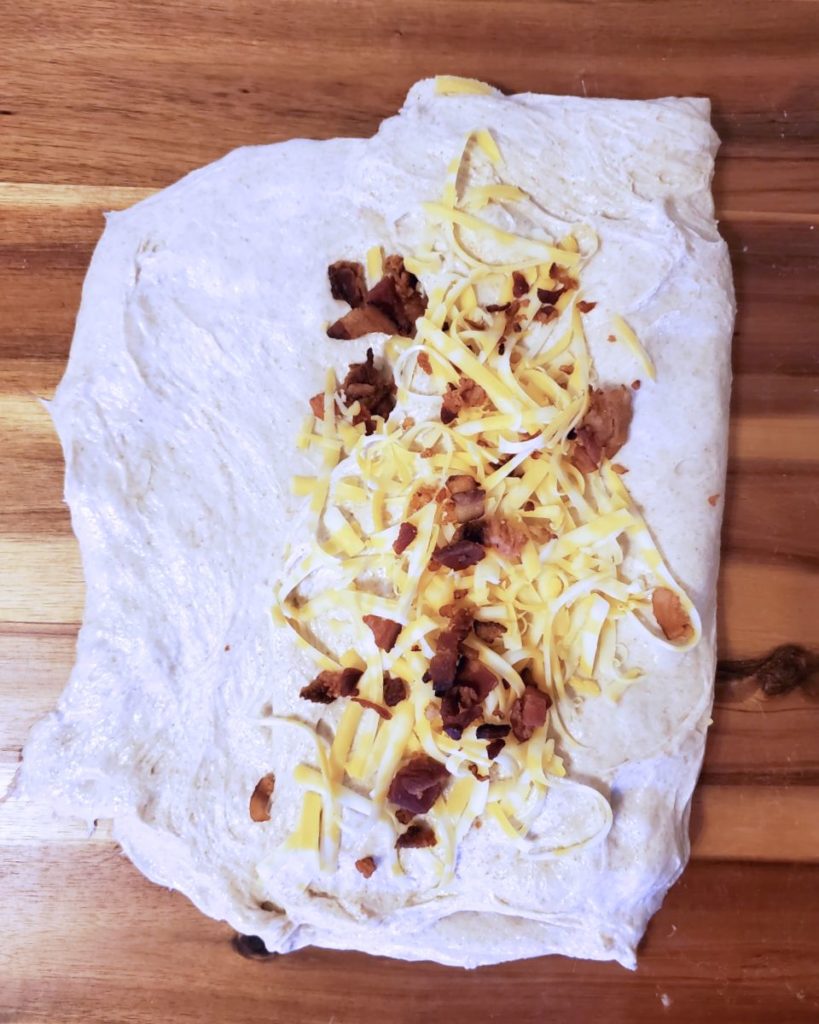
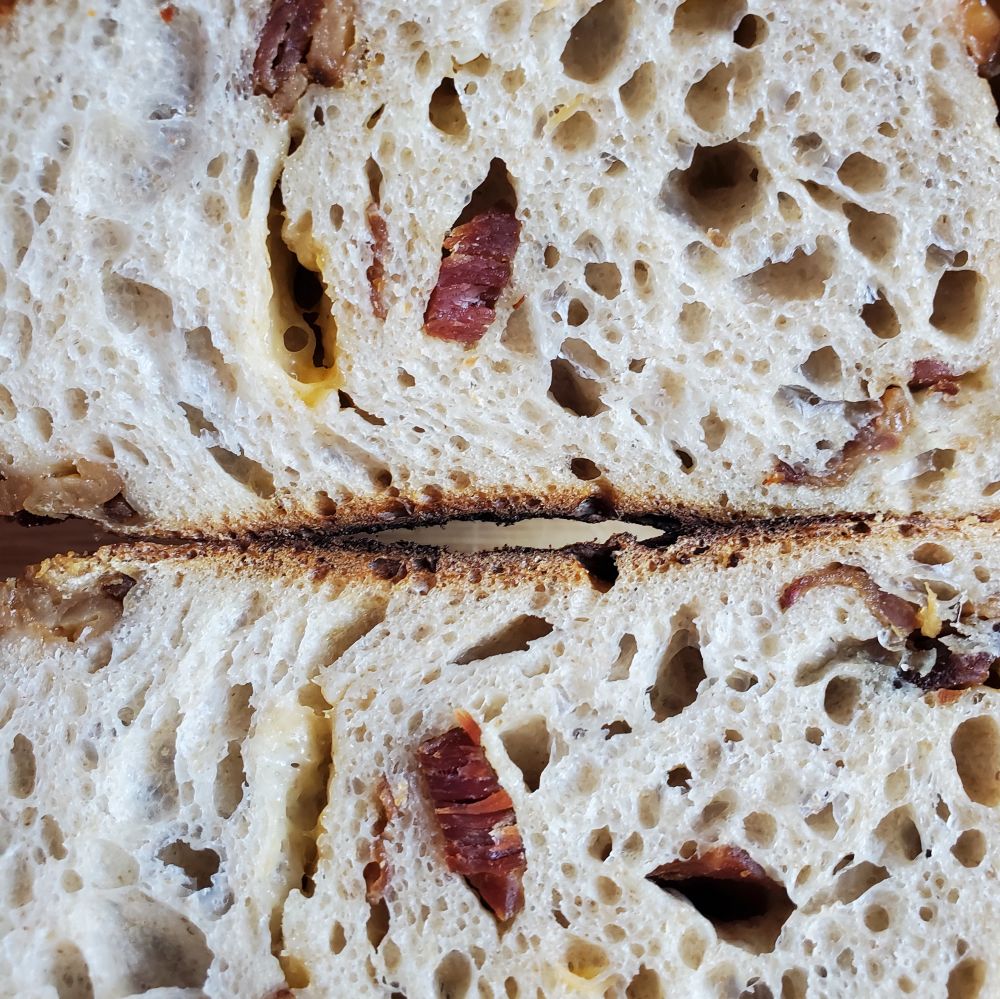
After a rest, the dough is turned over and stretched to a large rectangle. For my right handed brain, the short sides are on the left and the right. In the center third, I sprinkle a layer of crumbled bacon and a layer of shredded cheese. I fold the right third over the middle and add another layer of bacon and cheese. I then fold over the left third to enclose the center. Like the preshape, I roll away from me to make a log folding the ends over to cover. Bacon and cheese will likely poke through the dough. This is just fine.


Using a bench scraper, flip the log into an oval banneton with cover that has been sprinkled with rice flour. I use a plastic fry basket and the linen from an 8 inch round banneton. Once in the banneton, pull the short ends up to create a good tension and do a stitch from left and right down the long side. A good sprinkle of rice flour so the top doesn’t stick and into a bag, then close and retard for at least 12 hours. For this loaf, 18 hours works well.
The next day, the oven is turned on to 500° with the top (like a frying pan) of the Combo cooker inside. I set the bottom on the stove. I give the oven 40 minutes to preheat and with 15 minutes left light a small flame under the pan on the stove. A piece of parchment paper for a sling is cut and put on an upside down pie pan. Out of the fridge with the banneton, a dust of rice flower on top and invert with the parchment and pie pan. Using a retractable razor, 2 or 3 scores across the bread and into the top of the combo cooker. The bottom is placed on top and oven closed. 20 minutes covered and another 13-15 minutes uncovered usually gets the job done. To help avoid a burnt bottom crust, I inserted a ¼ sheet pan under the combo cooker after the oven is heated.
Recipe:
Ingredients:
- 50 grams White Whole Wheat Flour
- 75 grams Bread Flour
- 125 grams AP Flour
- 2%, 5 grams Diamond Crystal Salt
- 50 grams starter 100% hydration
- 170 grams Water
- 2/3 lb smoked bacon, cut and browned
- ¾ cup shredded cheese of choice, I have used Colby-Jack but a sharp Cheddar should be better
Method:
- Mix flours and salt, mix well
- In separate bowl, mix starter and 75% of the water a little bit at a time
- Make well in flour and add starter mixture
- Mix
- Add reserved water around the edges of the bowl to dampen all flour
- Use hands to make a shaggy dough ball
- Cover for 60 minutes
- 1st Stretch and Fold, set timer for 40 minutes
- 2nd Stretch and Fold, set timer 40 minutes
- 1st Coil Fold, timer 40 minutes
- 2nd Coil Fold
- Into Bulking Container on counter until it has risen to 150%
- Turn dough out onto unfloured board
- Preshape batard
- Let rest 20 minutes
- Turn dough over and stretch to large rectangle
- Layer most of bacon and cheese into center third only
- Fold over 1 outside third of dough
- Layer rest of bacon and cheese over fold
- Pull last third of dough over cheese and bacon
- Roll to Batard shape
- Invert Batard into lined banneton dusted with rice flour
- Stitch Batard to build tension on dough
- Sprinkle with rice flour, bag and retard 12-18 hours
- Preheat oven and baking vessel
- Invert cold Batard onto Parchment Paper sling
- Score loaf
- Lower into cooking vessel
- Add lid to vessel
- Cook covered for 20 minutes
- Remove cover, turn oven down to 450°
- Bake another 13-15 minutes
- Put Batard on wire rack to cool 2 hours before cutting
- Notes: Bread tastes better the next day (if there is any the next day). The bacon adds it’s lovely perfume to the loaf.


